Thursday, January 30, 2014

How to REALLY Time Mailing Invitations

"When should I send out my invitations?"

The answers to this question vary widely depending on who you ask. Every website will tell you something different. I learned from my mistakes and believe I have a formula for the perfect invitation timeline.


In hindsight, I wish I would have sent out Save the Dates. They are a great way to alert your potential guests that you are engaged and that they will be receiving an invitation in the mail closer to the date. This helps get the thought into their head to take off work or make arrangements so they can attend. I recommend sending these out no later than six months before the wedding day or else they become irrelevant. For longer engagements, you should send out Save-the-Dates a year before.


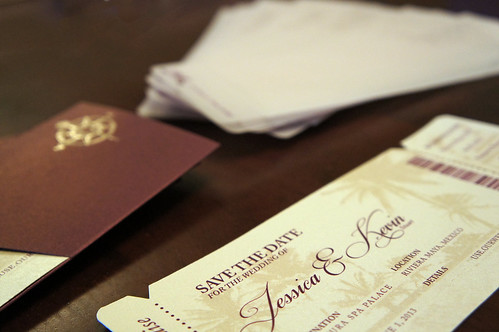
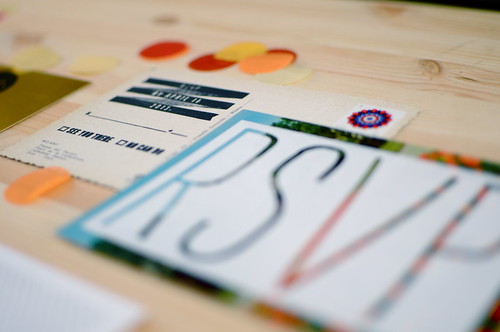
Generally, the rule is to send invitations out between 8 and 12 weeks before the wedding. I believed that 12 weeks was not enough time to get the responses I needed for vendors. Invitations not only tell guests the details of the wedding day, but the responses will give you an indication of how many guests will be coming. This is used to set out the right number of seats and tables, order enough food for dinner, make sure there is plenty of dessert available, enough drinks to keep the party going, and so the DJ can bring the right equipment for the number of people.


For all of these reasons, I wanted to send my invitations out very early. I thought I would get responses early and not have to worry about the guest count. This completely backfired. Either the invitation got buried under months of other mail pieces until it was forgotten, or people RSVPed "yes" early then forgot about the wedding and didn't show up.


Trying to get a guest count was very, very difficult for me. What I should have done (and what I recommend all brides do) is go through the guest list with both sides of the family and mark what people would absolutely come, what people might come, and what people most likely would not show up. Even though there will be strange mix ups in that number, it will be close enough to get an accurate guess without having to stress and rudely call up people and ask if they were coming. I was one of those rude brides because wedding websites assured me it was perfectly fine to do this. It still didn't help me with the people who said yes then forgot to show up or something else came up.


Because of my dilemma, I have the perfect answer for the age old question. Send out the invitations between 12 and 16 weeks before the wedding. Include an RSVP method, even if you take my advice and estimate your count. Keep track of these RSVPs and who did not answer.


One month before the wedding, create a cute postcard with a picture of you and your fiance on the front, preferably from your engagement shoot. On the picture, put the date of the wedding. On the back, say something like, "We are so excited that our wedding day is only a month away and hope you are too! (Name) and (Name) are looking forward to seeing you on (Date)." Underneath this friendly reminder message, I would also put, "If you have not RSVPed, please call (Number) or email (Address)." This gives people a direct line to contact you without having to go through the trouble of putting something in the mail. This way you can get more RSVPs and remind those who responded yes that your wedding is coming up.


The guest count and RSVPs were the hardest part of wedding planning for me. Luckily, you get to learn from my mistakes and find out the best way to let your guests know when they get to enjoy your special day with you. Don't forget to check out my previous blog post about the magic of Vistaprint to order all of your wedding stationary.

From now until Sunday, February 2nd, my eBook "How to Create the Ultimate Wedding Planning Binder" will be available on Amazon Kindle for only 99 cents! Take advantage of this amazing price while you can!

Tuesday, January 28, 2014

The Latest Trend: Chalkboard Signs

Every few years a new wedding trend will appear. Sometimes it is just the most popular dress style. Others it is a song that everyone uses for their first dance. For the past couple years, the trend has been DIY, simplistic-yet-chic weddings.

I'm going to attribute this DIY trend to the rise of Pinterest as a major influence in wedding planning. Women can now brainstorm ideas for their wedding before they are ever engaged (another great reason to get my eBook about how to create a wedding planning binder - it's never too early to be prepared!).


I was absolutely a victim of this DIY movement. Most of my decor and other wedding ideas came directly from Pinterest. It was so much cheaper to do things myself than trying to pay for stuff premade. Some things completely backfired, like spending weeks creating monogrammed champagne flutes for the guests to take home. No one ended up taking them, even with my note on the table. Now I use my champagne flutes in place of red Solo cups at all family parties. Other things, like my chalkboard signs, worked out perfectly.


Pinterest is full of pictures for this beautiful, simple-yet-chic chalkboard trend. For years before I got engaged, I pinned these beautiful chalkboard signs as a simple decor option. The problem was you either had to learn excellent calligraphy or hire a professional sign maker to accomplish this look, neither of which I was willing to do.


Then I found this pin that taught me how to do my own chalkboard signs. You buy chalkboards, stencils, chalk, and a chalkboard marker (found at your local arts and crafts store, like Michaels) to create these signs. Sharpen your chalk to a point and use the stencils to trace the letters you want. Fill the blank space with the chalkboard marker and Voila! It looks like you had an expert calligrapher create your decor.


Of course, no DIY thing on Pinterest will ever go perfectly. I couldn't find the chalkboard size I wanted anywhere, so I wandered around Michaels until I came up with a alternative. I bought a four pack of canvas prints, black chalkboard spray paint, cardboard scroll frames, and blue spray paint.


I used the black chalkboard paint on the canvas to create an authentic chalkboad look. I then spray painted the cardboard scrolls to match my wedding color and hot glued it to the canvas. I didn't have the right size pencil sharpener to sharpen my chalk, so I made do and simply used my chalkboard marker over the actual chalk. I luckily found some chalkboard markers that contained all of my wedding colors (blue and fall shades) to make my boards more colorful.

I made a ceremony program sign instead of printing out a bunch of paper programs, an I-Spy camera game that I got off Pinterest in case guests got bored, the website and code to share photos from the wedding, and a fun little "History of Us" sign with significant dates from our time together. All of these ideas I got from Pinterest. I also made some smaller chalkboard signs out of silver serving trays explaining the desserts, guest book, and signature drinks.


I was extremely happy with my signs, but if you want perfection higher a calligrapher. It was trying at times, especially wrestling with my unsharpened chalk, lining up each letter of my stensils, trying to make everything fit, and forcing just a little bit more color out of my markers. As you can see, I used my very best cursive on some parts of the signs because I was fed up with the stencils. Overall, I love my chalkboard effect and would recommend this DIY project to anyone.

From now until Sunday, February 2nd, my eBook "How to Create the Ultimate Wedding Planning Binder" will be available on Amazon Kindle for only 99 cents! Take advantage of this amazing price while you can!

Thursday, January 23, 2014

Invitations and More: The Magic of Vistaprint

Wedding traditionalists will tell you to get your invitations from a fancy invitation designer, either one you visit to customize your invitations in person or a complicated website full of invite options you have never heard of. If you want the regal invitations with bows, strings, bells, whistles, and whatever else you can cram on there, then you have to go to these specialized stores. If you simply want a beautiful invitation to send out to your friends and family, then I suggest Vistaprint.


Vistaprint is an online printing website that began in 1995 when the internet was still a baby. They are known for on demand printing and have hundreds of products available, from promotional materials to (you guessed it) invitations. They only provide customization options that people actually need, taking the complication of printing.

Even though their products are stock designs, if you are particular (like I was) then you customize the arrangement and amount of text, the font, and the colors. You can also choose from different backing options or upload your own image to use. You can also add images to the invite, either your own or from their stock, but I don't recommend it unless you choose a design that is set up to add images. Vistaprint gets a little picky when you add your own images without a pre-done image layout.

TIP: Make sure when you start moving text around and adding images that you are doing it right. It can be very easy to misalign text boxes or add images that will come out grainy or pixelated. Spend a lot of time and care arranging your invite layout and quadruple check your design before submitting to the printers.


Not only can you get your invitations through Vistaprint, but any and all wedding stationary you need. Within each design family, there are multiple stationary options so all of your papers will match. Vistaprint offers:


  • Invitations
  • Save-the-Dates
  • RSVP cards
  • Direction cards
  • Thank you cards
  • Bridal shower invitations
  • Engagement party invitations
  • Reception place cards
  • And more

Each card has a front and back option, along with numerous other choices. You can get a sheet card or folded card. You can upgrade to a higher stock paper. You can even choose printing options to make your design basic matte or premium glossy. If you don't like any of the predone designs and you are super crafty or graphically talented, you can upload your own design to print.


The best reason to choose Vistaprint (right behind their hundreds of beautiful design options) is the price. If you were to go to Vistaprint and order your stationary right now, it can cost as little as $15 per 10 invitations. This is much cheaper than other invitation retail sites. But it gets better.

Vistaprint is constantly offering deals on Groupon to all areas across the US. Their deals usually consist of something like, "Spend $10 on this Groupon and get $50 worth of products." You can also visit the wonderful Retail-Me-Not to find excellent coupons for free shipping and other discounts on your orders.

If you are looking for more wedding planning advice, along with a way to keep track of how many invitations you need to order, consider checking out my eBook on Amazon called, "How to Create the Ultimate Wedding Planning Binder - And Other Helpful Wedding Planning Tips."

P.S. This is NOT a sponsored post (I wish!). I just really love Vistaprint and think their products are perfect for most couples.

Tuesday, January 21, 2014

Wedding Day Essentials: The Emergency Kit

When I was writing my wedding planning eBook, I briefly mentioned the emergency kit in chapter ten. It is one of the random miscellaneous things you need to stick in there, but it is also very important. While I didn't use everything I packed in my emergency kit, I was definitely happy that I brought the things I did use. You never know what you are going to need that day.


There are many different emergency kit lists online, but all of them seemed a little incomplete to me. I opened maybe 12 different blogs that had emergency kits listed, trying to find one that had new items for consideration. Each person's emergency kit will be a little different, so I recommend you do some additional research and find blogs that have complete kit lists that fit your needs. I designated the items on my list by bride, groom, and both. Some things I packed in my kit that could be used for both and I kept sending my Maid of Honor down to the boys room to see if they needed anything from the kit.

Bride

Tissues
Hairspray
Lip Gloss
Concealer
Mascara
Powder
Comb
Deodorant
Curling Iron
Bobby Pins
Nail File
Perfume
Baby Wipes
Chalk (to color in any strange stains on your dress)
Contact Solution and Case
Extra Contacts
Scotch Tape
Straws (so your lipstick doesn't get messed up drinking a water bottle)
Hand Gel
Tampons/Pantyliners

Groom

Comb
Deodorant
Lint Roller
Cologne
Inhaler
Hair Gel

Both

Cuticle Scissors
Safety Pins
Sewing Kit
Bandaids
Mints/Gum
Ibuprofen
Allergy Medicine
Tide Stick
Mouthwash
Eye Drops
Phone Charger
Chapstick

I also used Pinterest for research on my emergency kit and other miscellaneous ideas that didn't seem to fit anywhere else in my binder. I found things like the idea to drink champagne and orange sorbet the morning of the wedding instead of the classic mimosa with orange juice. I also found a very helpful blog post that gave a tip to spread baby powder on your thighs before you put the dress on so your legs don't chaff when you inevitably sweat.


I love Pinterest because just typing in "wedding" in the search bar will give you hundreds of pins full of inspiration, advice, and tips you never would have thought of. All of the little tips I collected went into my Gifts and Miscellaneous folder on my binder. To see what else you need for your binder, or how to effectively build one, check out my book on Amazon: "How to Create the Ultimate Wedding Planning Binder - And Other Helpful Wedding Planning Tips"


Thursday, January 16, 2014

Release of my eBook!

Hello hopefully-soon-to-be blog followers!


I am so excited to announce the arrival of my first ever eBook: How to Create the Ultimate Wedding Planning Binder - And Other Helpful Wedding Planning Tips.


I just finished editing the complete draft last week, but rushed to get it on Amazon on January 16th, 2014. This date is significant, because a year ago to this day my now-husband proposed to me. I had no idea what I was getting into and now I have the wisdom and experience to hand down my planning secrets to future brides who also have no idea what they are getting into =)


I decided to write this book because of how many people were amazed at my organization and planning with my insane binder (pictured above).


Vendors, family, friends, and strangers were impressed with my binder and all the information contained in it. I gave advice to other brides-to-be throughout my engagement and was encouraged by my husband to create a book on how to plan a wedding using a binder for organization. I decided to go for it.


In the eBook, people will find how to make a wedding binder and all of the divider folders to organize the information needed. I teach how to construct a timeline, no matter how soon or far away the wedding date is, along with how to accomplish every major category of the wedding planning.


The eBook will be released at the initial price of $2.99, but I hope to run promotional specials every few months so more brides will be able to get help from the book. I also have the book available in the Lender's Library. So, if you have an Amazon Prime account, you can check the book out for five days absolutely for free!


I will also post regularly on this blog after the release of the book, giving additional wedding planning advice and tips, along with awesome things I see on Pinterest that I wish I had done. My initial goal is to post twice a week, probably on Tuesday and Thursday. I hope this increases over time. Please feel free to ask me any questions in comments about wedding planning and I will try to give you the best answer possible based on my experience. I hope you enjoy my eBook and hopefully will gain some insight from this blog as well =)

You can find my eBook on Amazon here or by clicking my book cover photo at the beginning of the blog post. Don't forget to rate and review the book!